1. Tones the legs abdominals
2. Helps you grow and produce sex hormones by stimulating pituitary and pineal glands.
3. Strengthens the spin, neck, shoulders, and arms.
4. Helps relieve fluid buildup in the legs and feet
5. Allows for a pure blood flow to brain cells.
6. Helps treat headaches, anxiety, asthma, sinusitis, hay fever, depression, diabetes, insomnia and symptoms of menopause.
7. Increases mental awareness as well as clarity.
8. Brings serenity and calmness to the mind.
9. Can reverse the effects of lethargy, sleep loss or memory loss.
10. Stimulates and strengthens the lungs which increases healthy breathing
11. Improves posture and digestion.
12. Helps with tonsillitis, continuous coughing, common colds, bad breath and palpitations.
13. Aids with problems in the liver, kidney, stomach, intestines and reproductive organs by reversing the pull of gravity.
The Health Benefits of Salambia Sirsasana: http://www.cnyhealingarts.com/2011/03/21/the-health-benefits-of-salamba-sirsasana-supported-headstand-pose/ is where I retrieved the information listed above. This site instructed me on how to carry out salambia sirsasana safely and also told me lots of benefits of this pose.
Saturday, April 12, 2014
Wednesday, April 9, 2014
Salamba Sirshasana- Supported Head Stand Pose
Translation & Meaning
Salambia means with support
Sirsa means head (after lyengar)
Asana means pose.
Many consider sirsasana to be the most important and beneficial asana in yoga because it feeds a supply of fresh oxygen-rich blood to the brain cells as well as to the pituitary and pineal glands. It had many only benefits too which are listed in the "benefits" section of my blog.
Salambia Sirsasana: http://www.yogisource.com/ydc/enlighten/enlighten_document.asp?ID=370§ion=9&cat=144
This website provided me with information about the name of this pose and what salambia, sirsa and asana actually mean in english.
Pictures of Salamba Sirshasana
Below are a few pictures of professionals demonstrating salambia sirsasana
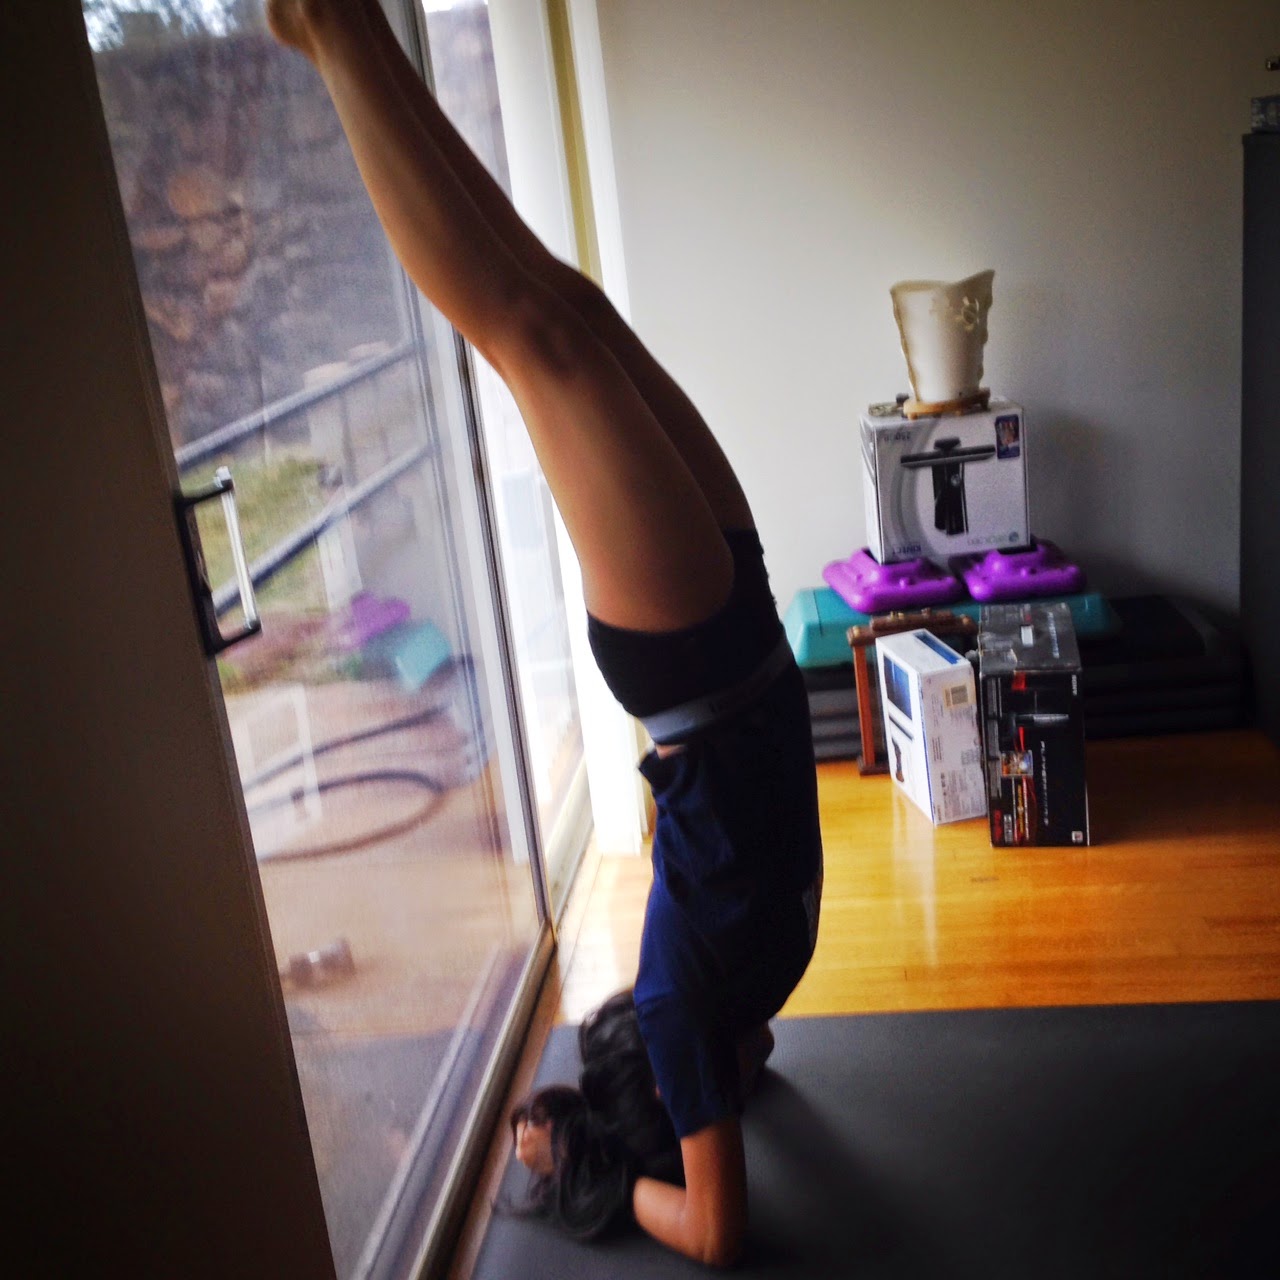 In the photo above, I am leaning a little too much and need to align myself better.
.JPG)
1.
Yoga In The Dragon's Den:http://yogadragonden.blogspot.com/2011_08_01_archive.html
The site above is where I retrieved picture #1.
2.
Practice. :http://ahum.typepad.com/ahum/love/
The picture above was retrieved from this site.
3.
A Strong Foundation:http://yogannaloveit.blogspot.com/
I retrieved the picture above from this site.
4.
Poses, it's the IDEA, not the IDEAL:http://byomyoga.blogspot.com/2013/04/poses-its-idea-not-ideal.html
This site is where I retrieved the photo above from.
Pictures of me demonstrating salambia sirshasana, however since I am a beginner I had to use the wall. I suggest all beginners use the wall to balance themselves and prevent injuries.
How to perform Salamba Sirsasana
Salambia sirsasana is not a pose for beginners. Some easier poses can help you prepare for salambie sirsasana like Tadasana or mountain pose. Gmukhasana or cow face pose and adho mukha svanasana or downward-facing dog can also help you prepare.
Before demonstrating the full pose, practice a firm base. Also try practicing the pose against a wall for helpful balance. Don't rush into the pose, if you have not fully accomplished work of the wrists, forearms, shoulders and upper back you will not come into proper alignment in the full pose and the results could be harmful.
Once you feel you are ready to execute the full pose, have a strong base, move away from the wall follow the directions below.
Step 1: Start off my padding your head and forearms with a mat or folded blanket. Then come on to your hands and knees, with wrists underneath your shoulders and with knees underneath your hips. Bring your elbows to the floor and make sure to keep them shoulder-width apart.
Step 2: Interlace your fingers, move your upper arms a little outwards and press the inner part of you wrists to the floor. Then, place the back of your head on the floor. Hold the back of your head with your laced hands and keep your arms in position.
Step 3: Bring your hips up as if you were in Downward Dog. Walk your feet closer to your elbows, with heels elevated, until your hips are over your shoulders. Firm your shoulder blades against your back and toward your tailbone to keep the torso lengthened and to protect your head and neck.
Step 4: Lift both feet away from the floor, even if that means bending your knees and hopping lightly off the floor. While you straighten your spine, firm your tailbone against the back of your pelvis. Rotate your thighs inwards and reach up through the balls of your feet.
Step 5: Press your forearms down to avoid having your neck and head supporting all the weight. Balance the weight evenly between your arms. If you bent your knees to come up, straighten them now.
Step 6: If this is your firs time executing this move, only stay in this pose for 10 seconds. Exhale as you come down and keep your shoulder blades firm. Have both feet touch the ground at the same time.
As you practice this posture more and more, add 5 to 10 seconds on your stay each time you are in this pose. As soon as you can stay for 3 minutes, continue to stay in that length of time for the next 7-15 times you practice this pose. Gradually work up to stay in the pose for 5 minutes.
If my steps weren't clear, here is a video that will hopefully help you accomplish salambia sirsasana
Muscles Involved:
Salambia sirsasana strengthens your core by working the muscles in your abdomen, back, neck, shoulders and arms. This pose really engages your neck muscles and brings your attention to alignment and balance. Not only does this pose work muscles in your body, but muscles in your brain. It both relaxes and energizes your mind.
The picture below shows the specific muscles used.

Actions:
-Engage your biceps, this will provide stability. Also engage the feet and legs by contracting the quads like you are standing.
-Try to keep your shoulders as far away from your ears as possible. You can accomplish this by pressing your elbows into the ground to prevent neck compression
-Working your core will also maintain stability.
-Use your upper and lower back to relieve the pressure on your neck.
-Continually try to keep your body and spine straightly aligned as if you were in tadasana. Your bones should be primarily supporting your weight, not your muscles.
The Health Benefits of Salambie Sirsana: http://www.cnyhealingarts.com/2011/03/21/the-health-benefits-of-salamba-sirsasana-supported-headstand-pose/
This article had tons of information not only on how to perform salambia sirsasana but on the health benefits of it.
Headstand: http://www.yogajournal.com/practice/178
This website provided me with a lot of information on how to perform salambia sirsasana and different ways to do it. It also provided good information for beginners.
Your Beautiful Karma: http://yourbeautifulkarma.wordpress.com/2013/10/31/yoga-muscles-in-inversions/
I received the photo from this site.
Supported Headstand: http://www.yogajournal.com/poses/481
This website pretty much has everything from steps to prepatory poses to beginners tips to modifications and props. If you need to know anything more about salambia sirsasana you should go to this website.
Awareness/ Analyze
In this posture, I felt like I had time to think. This pose made go upside down and with the blood rushing to my head, I couldn't look around and notice everything around. I had to face the thoughts inside my head. It was a very hard pose to accomplish and I don't think I have it down perfectly but hopefully I'm getting closer. Even though I felt like I was struggling in the pose, when I found my ground, and got comfortable I breathed in and out and I felt pretty calm in this pose. I felt like I could hold it for a couple of minutes, which I did not end up doing, but still I felt like I could. I felt like I could feel every part of my body working, as that is what salambia sirsasana does, it gets you in touch with every muscle in your body; every part is getting worked. I felt strong in this pose and felt more core strengthening.
To be more in alignment, I definitely need to get stronger so I can get away from the wall. Once I get stronger and obtain balance in my body then I can do the full posture without the wall and without any help. Once I am away from the wall I can align myself better. I need to bring the tops of my feet over my head more and try my hardest to not lean away and push out my belly. From my picture, I can see that my back is way too arched. I need to line the top of my arches with my pelvis and with the crown of my head so my body is lined up in a straight line.
To be more in alignment, I definitely need to get stronger so I can get away from the wall. Once I get stronger and obtain balance in my body then I can do the full posture without the wall and without any help. Once I am away from the wall I can align myself better. I need to bring the tops of my feet over my head more and try my hardest to not lean away and push out my belly. From my picture, I can see that my back is way too arched. I need to line the top of my arches with my pelvis and with the crown of my head so my body is lined up in a straight line.
Sunday, April 6, 2014
Subscribe to:
Comments (Atom)